Pages

Showing posts with label zucchini. Show all posts

Monday, September 19, 2011

Homemade Beet Pasta with Zucchini and Goat Cheese

I finally did it! I finally made homemade pasta! This has been something I have wanted to do for over a year, and finally I made an attempt at it! Now, it might seem like all I do now is eat and make Italian food since I got back from Italy. I swear, that is not the case. I still have been making overnight oats, lentil stews, and salads galore. However, as I was looking at some of my evernote recipes, I came across this beet pasta by bell' alimento. Bell' alimento is filled with Italian recipes, so I suggest you take a look around the site. Anyway, this caught my attention because not only was the pasta beautiful, but we had some beets from the garden that were ready to be pulled. Perfect timing.

Homemade pasta is incredibly simple to make, especially when you have a kitchen aid mixer. I am lucky enough to have access to one right now so making the dough was a breeze. I followed the recipe from bell' alimento almost exactly, so you can reference from there. However, I did substitute some kamut flour (1 cup) for some of the all purpose.  I also had to add some more water, which may be due to the flour substitution. It also might be because my beet puree was not as fine as it should have been. I recommend you really pulverize those beets.

Addition of the Beet Puree
Mixing in the Beet Puree
While i did have a kitchen aid to make the dough, I do not have any utilities to actually make the pasta itself. This means that I was working hard rolling out the dough as thin as I could, and then using a pizza cutter to make my pasta. Let's just say it was rustic.

Wearing a pane (bread) apron my Nonna brought my Mom from Italy
Since I was making this for dinner and it was already 6:30 when I started, I made the pasta in batches. The first batch was for dinner that night. It was a little thick.

The First Batch Drying
This made it difficult to cook and the pasta was very large. It really didn't matter though. Because it was homemade it didn't feel too chewy, and was still delicious. It was a little disappointing though when the vibrant red colour turned pale pink upon boiling, and the water took up most of the colour. It still look pretty against that green zucchini and the goat cheese. It was such a beautiful dinner.

Homemade Beet Pasta with Zucchini and Goat Cheese

1 serving of homemade beet pasta
1/2 medium zucchini, sliced thinly and in half
2 garlic cloves finely minced
1/2 tbsp olive oil
1 serving of goat cheese

1. While pasta is cooking, heat olive oil on medium heat until pan is hot.
2. Add garlic and sautee for a few minutes until fragrant.
3. Add zucchini and heat until cooked through.
4. Drain pasta and add to the pan, tossing to combine.
5. Add goat cheese in crumbled and toss to combine.


How pretty is it! It isn't only pretty but it tasted good too. Such a good dinner that was worth the effort! Next time it won't be so effort filled though. After dinner I took the rest of the dough out of the fridge and rolled it out, thinner than I had before. I also cut this one into lots of different shapes. This was really one big experiment.


I made some lasagna noodles, linguini, and farfalle. I allowed them to dry overnight between two tea towels. the lasagna noodles needed some extra time, but in the morning I bagged up the pasta in ziploc bags and stuck them in the freezer. We will see how the recipe handles it.

I am really excited to try out some more pasta recipes since it isn't all that hard. I think I might put a pasta roller/maker on my Christmas list though.

Monday, August 1, 2011

Tomato, Walnut and Basil Sauce on Raw Zucchini Pasta

The garden is booming! My parent's garden that is. My little planters on my patio have yielded 0 fruit, and it will stay that way unfortunately. There was a lonely little pepper growing a few days ago, but it looks like the neighbourhood animals beat me to it. Oh well, it was worth a try. At least I have access to my parent's and grandparent's garden this time of year. Every weekend I have been coming home with lettuce, kale, swiss chard, and radishes. Yesterday, I came home with the first of the tomatoes, zucchini, cucumber, green pepper and chili pepper.

I wanted to make a dish that was light, raw, and would really highlight the freshness of the veggies. I have made raw zucchini pasta in the past, but wasn't a huge fan. Since I don't have a mandoline, the zucchini was irregular shaped and not as thin as it should have been. I also didn't have the right kind of sauce for it. With the though of gazpacho in mind I remembered this recipe, which is where I originally saw 'raw pasta'.  I made a few changes and it turned out wonderful. Extremely flavourful and perfect for these hot summer days we have been having.

Tomato, Walnut and Basil Sauce on Raw Zucchini Pasta adapted from Mis Pensamientos

1/2 cup walnuts
1 handful of basil
1/2 tsp parsley
1/4 large onion
juice of 1 lemon
1 tbsp olive oil
2 garlic cloves, chopped
2 cups chopped tomatoes
2 zucchini

1. Add walnuts to food processor and pulse until finely chopped.
2. Add basil, parsley, onion, lemon, olive oil and garlic. Process until a pesto forms, scraping down the sides as neccesary.
3. Add tomatoes and pulse until combined (I only pulsed 3 times). Drain any excess liquid.
4. Use a mandoline to thinly peel the zucchini, or use a peeler to make the 'zucchini pasta'. Top with the pesto sauce.


After taking a look at this photo I realized the sauce doesn't look too appetizing, but I can assure you it tastes wonderful. I almost added some chili peppers but I am glad I didn't because it already has quite the bite from the basil and garlic. I also would have topped this with some goat cheese if I had some on hand. that bowl is 1 small zucchini and about 1/3 of the sauce. I think the leftover sauce would be wonderful in a cold pasta or quinoa salad.

**Update: Zucchini pasta is not for everyone. I really don't find raw zucchini all that appetizing, I much prefer it cooked. Maybe I would like it better if I had a spiralizer? As I was eating this for lunch I really wished I had real pasta, or cooked zucchini at least. Maybe some cheese would have made it better. Anyway, definitely give zucchini pasta a try at least once, but if it isn't your thing, I don't blame you, but don't forget about the tomato, walnut and basil sauce...it goes nicely with lots of other things.

I hope everyone had a great long weekend. Mine was low key and fairly relaxing. I spent some time with my family and made more preparations for moving into my parent's house, and for my trip to Italy. It is becoming more of a reality that I will be moving out of my current house and leaving my awesome housemates :(

I will leave you with a picture I took today of Tew's Falls in Hamilton.

Sunday, November 14, 2010

Vegetable and Chickpea Soup

Better late than never is what I say. Actually, that saying is totally not me as I don't like to be late for anything. But in this case, posting this recipe later than I anticipated is much better than never posting it at all. This was my first soup of the fall/winter season and it was quite a success. I still have some in the freezer which will be much needed in the month to come I am sure.

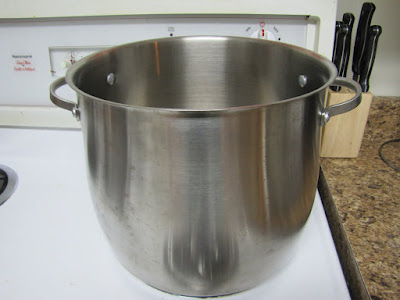
It all starts with a pot.


I love this pot. Not only because it was a fantastic deal at the time but it was the first pot/pan I ever bought for myself. It consistently provides me with fantastic soups, stews and sauces. Obviously due to the pot itself.

Then you need some ingredients. This is what I used (I ended up not using the stewed tomatoes and also added kale and spinach).


You have to use your muscles a bit and chop until you cannot chop anymore. I hate chopping carrots SO much. I especially hate chopping baby carrots, but I needed to use them up.


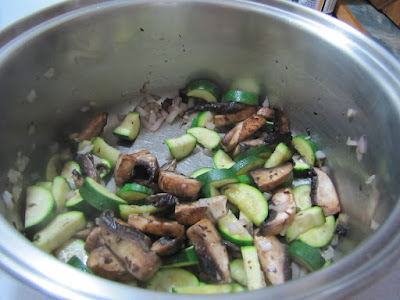
Let the soup making begin!


Vegetable and Chickpea Soup:


1 tbsp olive oil
1/3 onion, chopped
carrots, chopped
2 small zucchini, chopped
2 cartons of vegetable broth
1 can of chickpeas
potatoes, cut up into bite sized pieces
1 stalk of kale, chopped
chopped spinach (I used frozen nuggets - about 8-10)
3 bay leaves
1 tsp basil
1/2 tsp oregano
1 tsp rosemary
pepper to taste

1. Heat the olive oil over medium-high heat. Add the onions and saute for a few minutes.
2. Add the carrots and zucchini and saute until soft. The zucchini could also be added later so they maintain some structure but I like it when they are mushy in the soup.
3. Add vegetable broth and chickpeas. Once the broth begins to boil reduce to medium-low so the soup is simmering and add the potatoes and the spices. Cover.
4. Simmer for about 5 to 10 minutes and then add the kale and spinach. Cover.
5. Simmer for another 5 to 10 minutes until the potatoes are soft.


This soup made some delicious lunches all week!


It was especially good with some aged white cheddar on top. It was great to kick off soup-season with a win and I look forward to some more successful creations.

Saturday, August 14, 2010

Mushroom and Zucchini Risotto

I have been wanting to make Risotto for a REALLY long time (like 1.5 years long). I have made fake risotto where it is just plain rice in a thick sauce that gives it a risotto feel, but not a real risotto made with Arborio rice. I finally got around to buying Arborio rice so I had all I needed really. It is such a versatile dish that is fairly easy (but a little boring) to make. A recipe is hardly needed and you can really get your creative juices running.

This isn't something I would make all the time. The only reason why is because Arborio rice is white rice and has a higher glycemic index than the all powerful brown rice. This means that the body releases the carbohydrates more readily which is not desired when choosing carbohydrates. But, in moderation, risotto made with Arborio rice is a wonderful treat and worth the efforts (from your biceps and triceps...from stirring).

I guess it has been almost two weeks since I made this. I found a recipe for a zucchini risotto which I used as a guideline as I had never made risotto before. I varied from it a bit and made a mushroom zucchini risotto. The ingredients for this dish are so simple which makes it so beautiful. When making risotto choosing the liquid for the rice to absorb is probably the most important. Be sure to pick good quality liquids. Whether you use tomato juice or broth or what-have-you, make sure it is awesome. I used my favourite vegetable broth for the occasion. I can't remember the brand but I think it may be Pacific All Natural Organic Vegetable Broth. Anyway, the key point is that the ingredients should have nothing but vegetables, water, and a little bit of salt.

Mushroom and Zucchini Risotto adapted from www.allrecipes.com...I think.

7 cups vegetable stock
1 tbsp olive oil
1 medium onion, chopped
2 cups uncooked Arborio rice
3 small zucchini
3 portabello mushroom caps
50 g soft unripened goat's milk cheese
black pepper to taste

Bring vegetable broth to a simmer in a medium pot. Heat olive oil in a separate pot on medium. Add onions and heat for 3 minutes until softened. Add the zucchini and portabello and satuee until browned nicely, about 5-8 minutes.


Add the rice and stir until coated, about 2 minutes. Ladle in the vegetable broth about 1 cup at a time, slowly stirring until most of the liquid is absorbed.


Add seasoning at this point (pepper or thyme in this case). Continue this adding and stirring until the rice is creamy yet al dente in the center. This was about 45 minutes for me. Once the rice is cooked, add in the cheese. I used goat's milk but Parmesan is definitely tradition here.


The broth I used could stand alone as a soup and therefore this risotto turned out very thick, which isn't really a bad thing. Next time I think I would dilute the broth a bit, or use a tomato juice. Also be careful when using broth to watch for the sodium content. Because you are basically concentrating the broth, it can end up quite salty if you don't use a low-sodium variety.

I will be making this again in the future, possibly with tomatoes since we are on lycopene overload over here, as I still have some Arborio rice. Look out for it!

In my next post I will talk about a wonderful Summer Slaw with lots of seasonal vegetables, mostly from my own backyard!

Monday, July 26, 2010

Crostini and Quinoa-Stuffed Peppers

For my parent's anniversary they received a wonderful gift basket from a friend with lots of Italian food products. It came with a jar of mushroom bruschetta and ever since, my Mom and I have been thinking about eating it with some nice crusty bread. While we were at the store yesterday we picked up a whole-wheat french baguette. We had all that we needed.

Before we began I wanted to make sure I would like this mushroom bruschetta. It looked delicious but I had no idea what it would taste like. So I tasted a bit and wasn't a big fan. I love mushrooms but didn't enjoy this preserve at all. So this led to creating two different kinds of crostini since my Mom liked the mushroom brushcetta.

I sliced the baguette thinly. Normally when making crostini you would toast the slices first, and then top them, but I was a little impatient. I topped half of the fresh slices with the mushroom bruschetta, and half with thinly sliced tomato and jarred hot banana peppers. Then I sprinkled them all with a bit of Parmesan cheese. I set the oven to broil and they took about 5 minutes to toast. So simple and delicious!


I had my crostini with barbecued eggplant and zucchini that my Dad had made the day before. I am not quite sure how he does it, but this is the BEST way to eat eggplant and zucchini. I will make a post on that recipe in the future.


For dinner I got together with Jenna to make a recipe from Healthy Girl Cooking. We have been eying multiple recipes from this site, and finally got around to making something. We decided to make Quinoa-Stuffed Peppers.

Quinoa-Stuffed Peppers, modified from healthygirlcooking.com

3 large bell peppers that stand up well
1 cup cooked quinoa
1 cup beans (any kind you like)
1 cup corn
1 tomato, chopped finely
10 basil leaves, chopped finely
parmesan cheese

Mix the quinoa, beans, corn, tomato and basil in a bowl. Cut off the tops of the peppers and cut out any seeds and white flesh.


Stuff pepper with as much filling as it can handle.


Bake at 350 degrees for 30 minutes. Sprinkle Parmesan cheese on top and bake for another 3-5 minutes.


Boy were these guys filling. They are very nutritious as well. They were lacking in the flavour department though. I would not serve these to guests until making some adjustments with the flavour. We brainstormed some ideas to increase the delicious factor for these peppers and came up with a few ideas:

  • after filling the peppers half-way, add a layer of cottage or goat's cheese, before filling the rest with the stuffing, OR mix in the cheese with the stuffing.
  • add a bit of salt, simple as that.
  • add cumin or coriander; there are endless possibilities in the spice department here.
  • cooking the quinoa in flavoured broth or tomato juice, or mixing in some tomato paste after cooking.
Any other ideas for making these stuffed peppers spectacular?